• How to use the ‘Custom Fields’

    Starting with v2.0 (April 25th, 2013), PHP Melody has the ability to assign custom fields to each video, article or page. This extra data is also known as meta data and it can include data such as:

    • Artist: Michael Jackson
    • Speaker: Thomas K.
    • Episode: #7
    • Season: #2
    • Video Part: #1

    These are merely a few examples of the possible uses for ‘custom fields’ or, as otherwise known: meta data. Custom fields are user defined, meaning you can define any meta data relevant to the video, article or page posted.

    Custom fields come in name/value pairs. The name is the identifier while the value is the actual information you wish to display on the page. In the first example, “Artist” is the name while “Michael Jackson” is the value.

    Custom Fields Usage

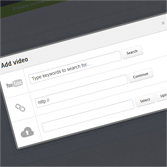
    Assuming we have a music video website, we’re going to add a new ‘custom field’ named artist. The following steps need to be taken to add the new ‘custom field’:

    1. After you’ve added/edited your video scroll to the bottom of the page to the area titled Custom Fields.
    2. In the first text field, titled ‘Custom name’, enter artist and in the second text field, titled ‘Custom value’, enter “Michael Jackson” or the artist associated with the video.
    3. Click the Add Custom Field button to assign this ‘custom field’ to the video before saving.

    Custom Fields

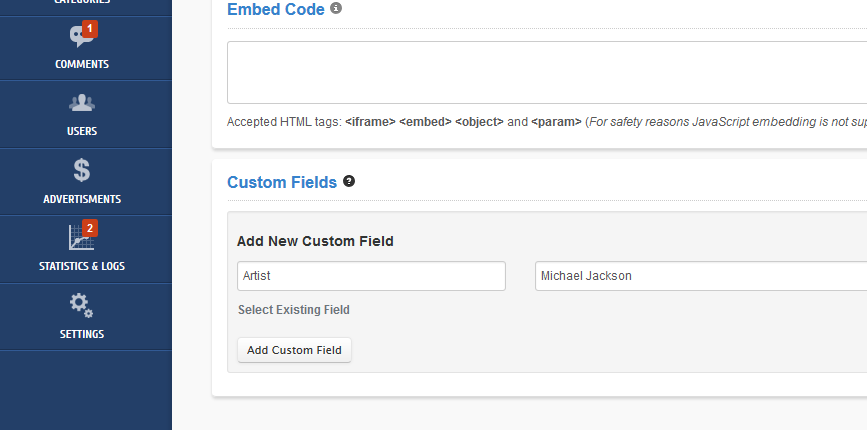
    The next time you post a video you can select the alredy created artist field by clicking the ‘Select Existing Field’ link within the Custom Fields form.

    You can add as many custom fields as your site requires.

    Displaying Custom Fields

    Once defined, you will have to output the value for this new ‘custom field’ on the actual page your visitors will see. This can be done by inserting some additional code into your theme. In our case, we will add the artist filed in the title of the page after the video name.
    For this, we need to edit the /templates/default/video-watch.tpl file:

    —————[ FIND ]—————

    <h1>{$video_data.video_title}</h1>

    —————[ REPLACE WITH ]—————

    <h1>{$video_data.video_title} {get_video_meta video_id=$video_data.id key='artist'}</h1>

    As underlined in the replacement code, the KEY was set to the ‘Custom Name’. In our case it was artist, as previously defined in the Admin Area (video editing/adding form).

    If we define another custom field, named season, we will use:

    {get_video_meta video_id=$video_data.id key='season'}

    This code can be placed anywhere in the video-watch.tpl file and even styled with some CSS afterwards.

    Note: this example was for a video page. To use the custom fields on an article page (i.e. article-read.tpl), the code would be:

    {get_video_meta video_id=$article.id key='season'}

    Additional usage

    If you have more than one custom field, you can list them all in an ordered list (<ul>) by using this following code in video-watch.tpl:

    {get_video_meta_list video_id=$video_data.id}

    or in article-read.tpl:

    {get_article_meta_list article_id=$article.id}
  • How to import from Youtube.com users with Russian characters.

    Unfortunately, the open Youtube.com API doesn’t permit searching by username if that username has Russian characters. Luckily, PHP Melody allows you to enter the User ID in such cases and circumvent the restriction.

    Below is a video on how to do this but here are the main steps, but it’s best to watch the video too:

    1. While on www.youtube.com, click on the Youtube username which should take you to the user’s Channel or Profile.
    2. Notice that the user’s Channel URL will look something like:
      https://youtube.com/channel/UC-fv_EW0shYu1rK4NTYd8hw
    3. Copy the User ID from the URL, in this case UC-fv_EW0shYu1rK4NTYd8hw and paste it into the PHP Melody’s “Import from Youtube User” page.
  • How to fix the video uploading process

    upload-problemDepending on the hosting company you choose for your PHP Melody based site, you may encounter some problems when it comes to uploading video files from the Admin Area.

    Since there are several problems that may occur, we’re providing several solutions:

    Increasing the default limits to uploading

    This is by far the most common problem. Webhosts set a low limit to how much the uploaded files can have. Usually you should be able to solve this problem in one of the following three ways:

    a) Edit /config.php and add the following lines of code:

    @ini_set( 'upload_max_size' , '128M' );
    @ini_set( 'post_max_size', '128M');
    @ini_set( 'max_execution_time', '300' );

    b) Create a new file named php.ini (on GoDaddy it might be php5.ini) with the following lines and upload it to your installation:

    upload_max_filesize = 128M
    post_max_size = 128M
    max_execution_time = 300

    c) Add the following lines to your already existing .htaccess:

    php_value upload_max_filesize 128M
    php_value post_max_size 128M
    php_value max_execution_time 300
    php_value max_input_time 300

    If none of the previously listed examples works, contact your hosting provider and ask them to increase the limit for you. The examples will raise the upload limit to 128 MB per file. If you need more than that, adjust the examples by editing the ‘128’ value.

    Removing the unwanted security

    Create a php.ini file and add the following two lines to it before uploading it to your PHP Melody installation (root folder):

    SecFilterEngine = Off
    SecFilterScanPOST = Off

    You may be on a restrictive shared hosting account and these tips might not work for you.
    In this case you can always contact the hosting provider and ask them to do it for you. Some of them might refuse to do so and if that’s the case, you might consider looking for a new hosting provider.

  • Youtube Import Error (Failed to connect to 2607:f8b0:4000:801::1013)

    Youtube Error with IPv6You’re trying to import/add videos from Youtube but you receive the following error:

    Failed to connect to 2607:f8b0:4000:801::1013: Network is unreachable

    If that’s the case, all you have to do is rename the following two PHP Melody files from your installation(s):

    /admin/src/youtube.php into /admin/src/youtube.php-bk
    /admin/src/youtube.ipv6.php into /admin/src/youtube.php

    Now try importing Youtube videos and enjoy PHP Melody!

    Note: this applies to PHP Melody v1.8.1 or newer

  • How to create a new MySQL user and database (video)

    As you’ve probably learned, each new PHP Melody installation requires a MySQL database and a MySQL user for that database. In the following article we’ll show you how to create your MySQL user and database. The example was created using cPanel. If you’re using Plesk or Godaddy, the video might not make match sense.

    In broad terms, here are the steps you need to follow:

    Step 1: Log into your hosting control panel (cPanel, Plesk, etc.)

    Step 2: Go to your MySQL database manager

    Step 3: Create a new MySQL database

    Step 4: Create a new MySQL user

    Step 5: Add the new user to the new database by granting “All Privileges”.

    The video might be a bit too fast to follow. Feel free to use the pause button.